Below are the pictured instructions and text to follow as well,
if you don't understand something or have questions please let me know I will
do my best to answer all questions!
Ok so I have seen a lot of these up-cycled plastic bags, where you fuse the plastic bags together with wax paper and an iron, my tutorial starts after the actual fusing of the plastic bags so here is a tutorial for that here if you need it!
So lets add our own flair!!
Here are the steps that follow the pics have fun :)
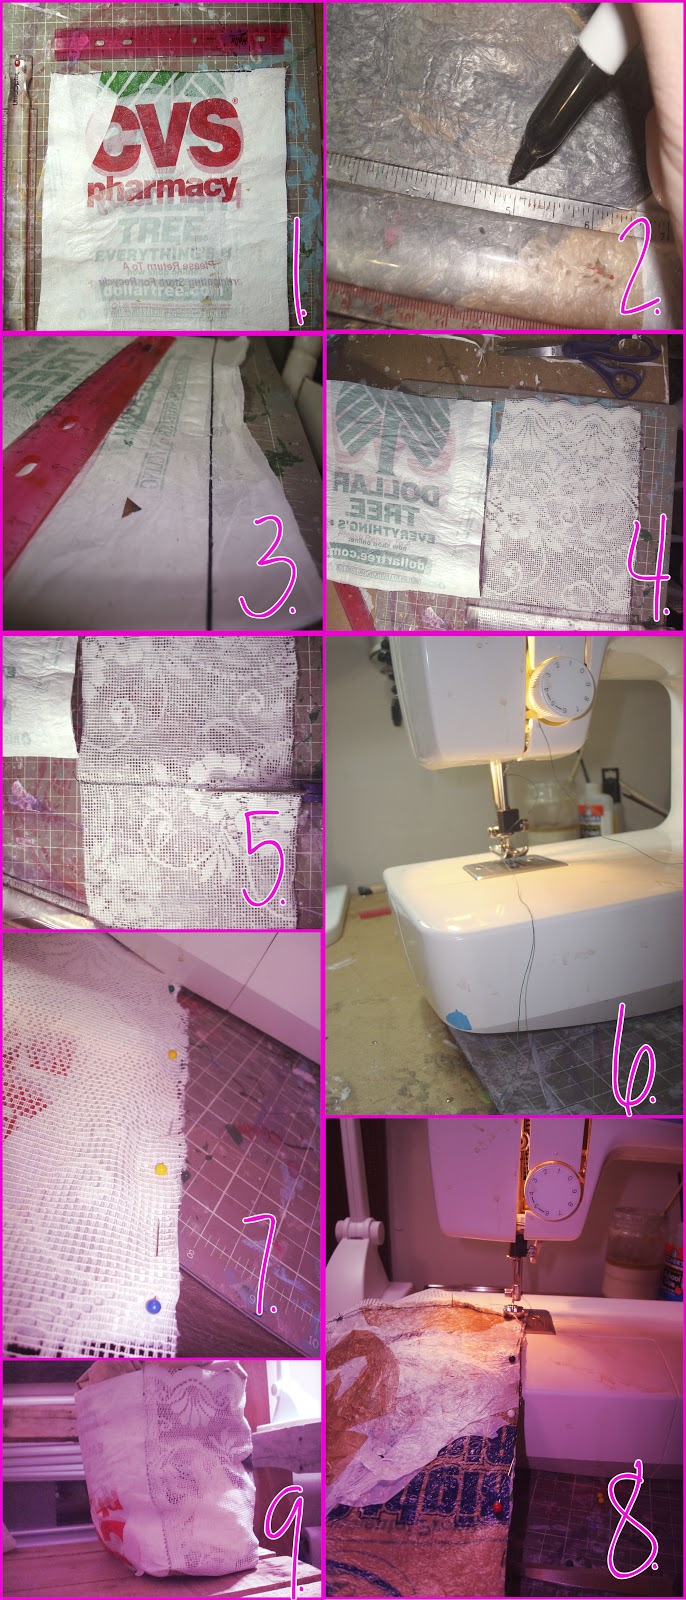
1. I have fused my bags together and made sure that the edges are straight, ( I dont have an actual size because it could vary with your plastice bag fusing), but you do need:
-2 pieces that are the same size for the sides of the bag
- 1 piece for the bottom that is the same lenght as the two side pieces but
not as wide
2. measureing all sides to make sure the are even and matching up to one another
3.&4. I am adding lace to the sides
to give it some pretty flair and I am measuring the sides of the plastic bags
5. I am measuring my lace to fit the sides of my bag and then cutting to match
6. Lets Sew!
7. using my pins to mark put together the sides and the bottom
8. sew all sides together inside out
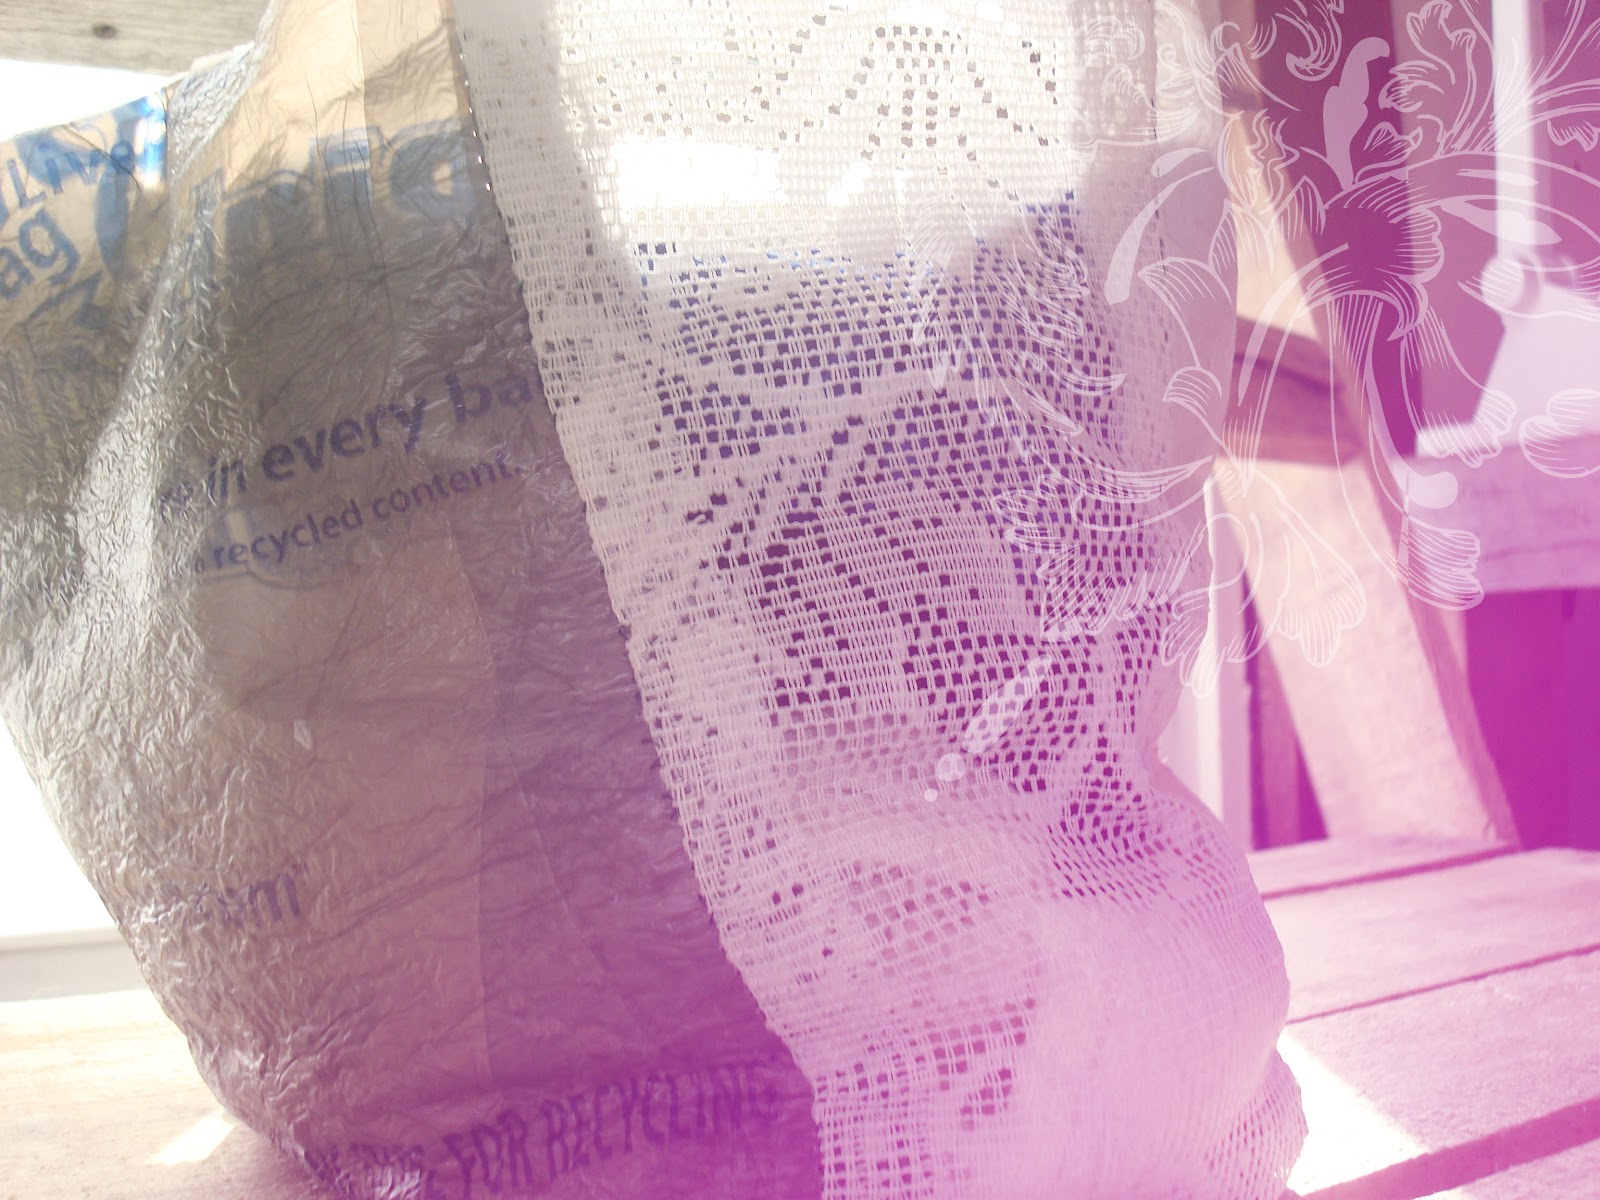
9. Flip bag out, and you have your self a cute little basket...add straps and you have a pretty little up-cycled bag!
I hope you enjoy all this tutorial I will be making more and I will update you on my newest upcycled bags!!
Every so often I can go through my families and my own closet and find some stuff that I am tired of looking at, but instead of throwing them in that goodwill dumpster, or just throwing them away, I have compiled these tutorials so everyone can clean out there closets and revamp there old threads! I hope everyone enjoys and, let me know what kinds of tutorials you have tried!!
****Also I am looking for Guest bloggers to write on my Blog, if you are interested please email me
Rubbishlove22@gmail.com
<3 Shana
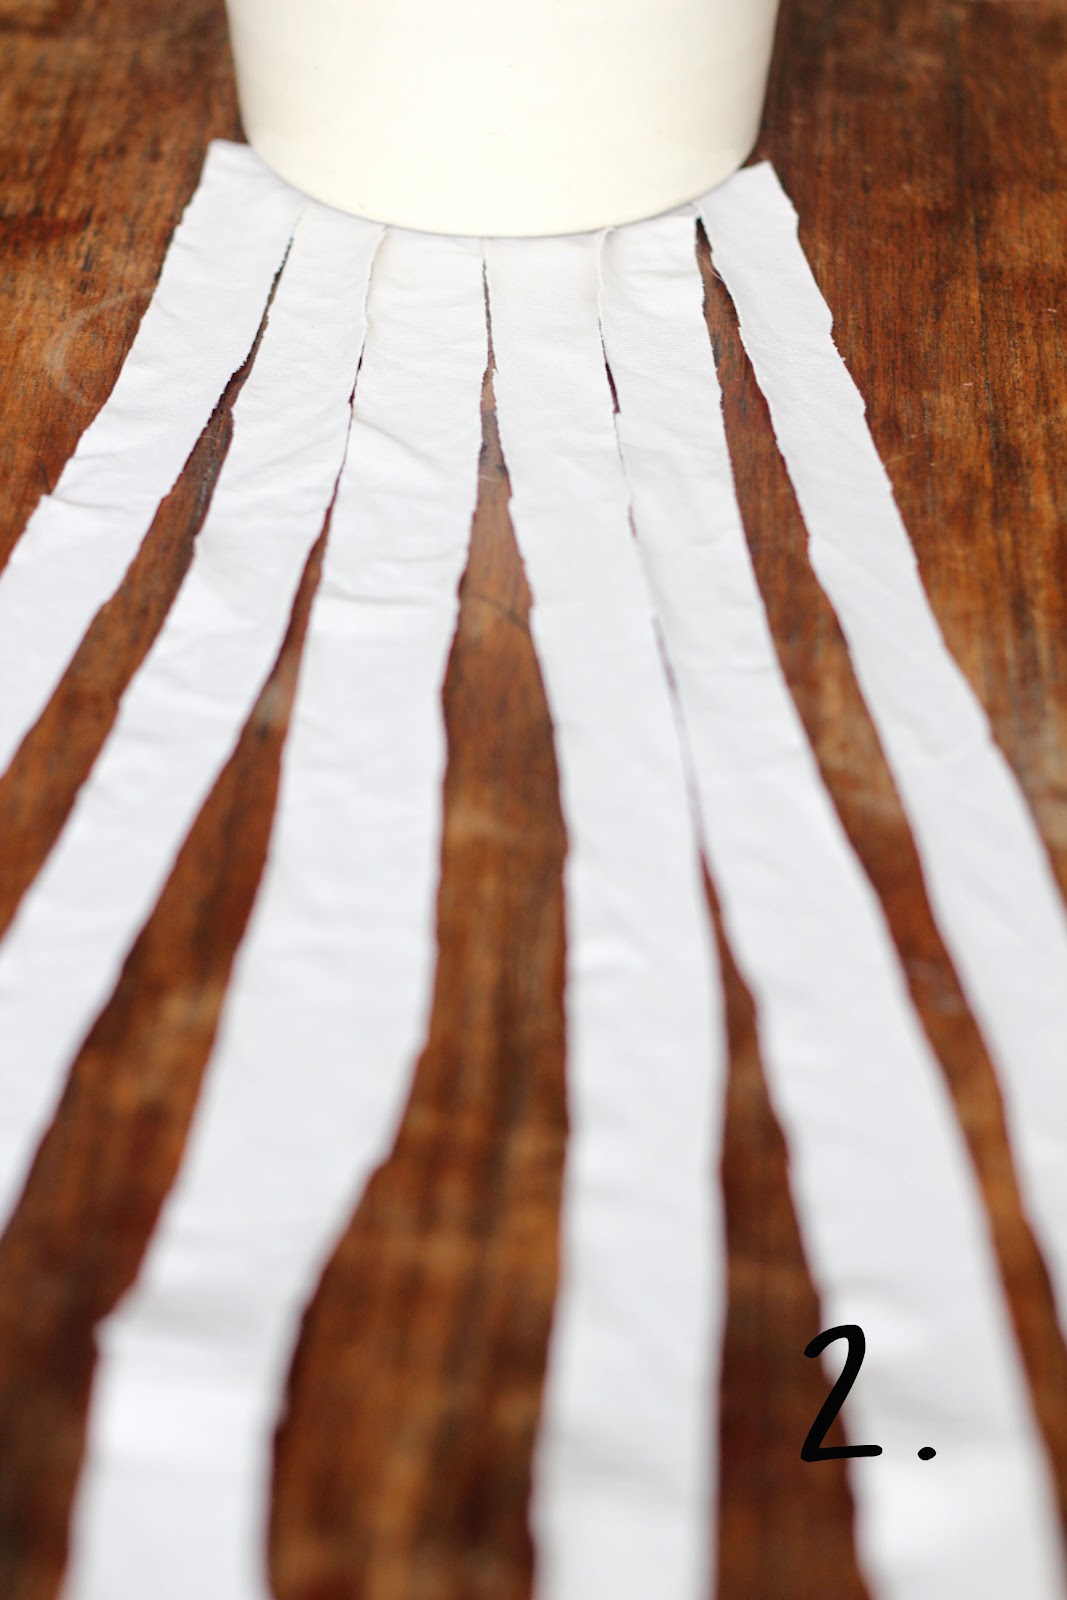
1. Diy Plant hanger from T-shirt!
2. Revamp those old Flip-flops 3.T-Shirt Backpack
Materials
T-shirt
Sharp scissors
Needle and thread
Large safety pin
Clothesline cord, about 6 times the width of the shirt
7/16-inch eyelet (or grommet) kit (see tip below)
Instructions
Turn the T-shirt inside out, then cut across the
shirt from armpit to armpit. You'll need only the bottom section.
Use the needle and thread to sew a simple stitch
across the shirt, about a half inch in from the cut edge, to seal what
will be the bottom of the bag.
Turn the shirt right side out. Snip the shirt's
hem almost all of the way through (do not cut any stitching) at the
midpoint between the two side seams. Attach a large safety pin to one
end of the clothesline cord. Feed the cord, safety pin first, through
the casing of the hem.
Follow the eyelet or grommet kit instructions to add eyelets to the bottom corners of the bag.
Thread the ends of the cord through the eyelet holes and double-knot them to secure.
Tips:
An eyelet or grommet kit can be purchased at craft stores or
online for around $15. In a pinch, you can cut the holes with scissors
and seal the cut edges with fabric glue, but the result won't be as neat
or as sturdy.
Due
to several questions about this tutorial, I decided to post an update
with more detailed steps. You can find the tutorial below:
1. Take 6
pieces of fabric, mine are about 45 cm long and 1,5 cm wide. Place
something heavy on the toppart to keep them in place.
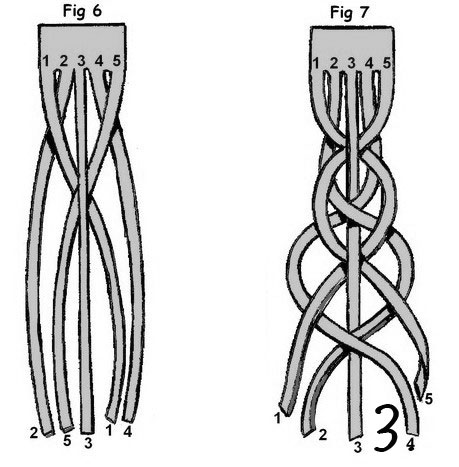
2. Take right strip and follow the red line in the picture.
3. It should look like this.
4. Take the left strip and follow the red line in the picture.
5. It should look like this.
6. Now repeat steps 2 and 4. Pull on them, but not to tight!
7. Keep braiding until you have ure desired length.
8. Get you're glue gun or some textile glue and place a stripe of glue on top of the end. Do this on both sides.
9. Cut the fabric that is on the other side of the glue strip. Not the braided side!
10. It should look like this.
11. Put some glue on the outside of the braid, like shown in the picture.
12. Place the other outside against it and push them together until the glue has dried.
13. Measure the width of youre braid.
14. Cut a piece of fabric. The size should be 2x the width of your braid + 1 cm.
15. Fold the piece of fabric around the part where the bracelet is attached. And glue it together.
All done!
You can of course also sew the bracelet instead of using glue.
The bracelet will be easy to slide over you're hand, because the fabric is stretchy and soft.
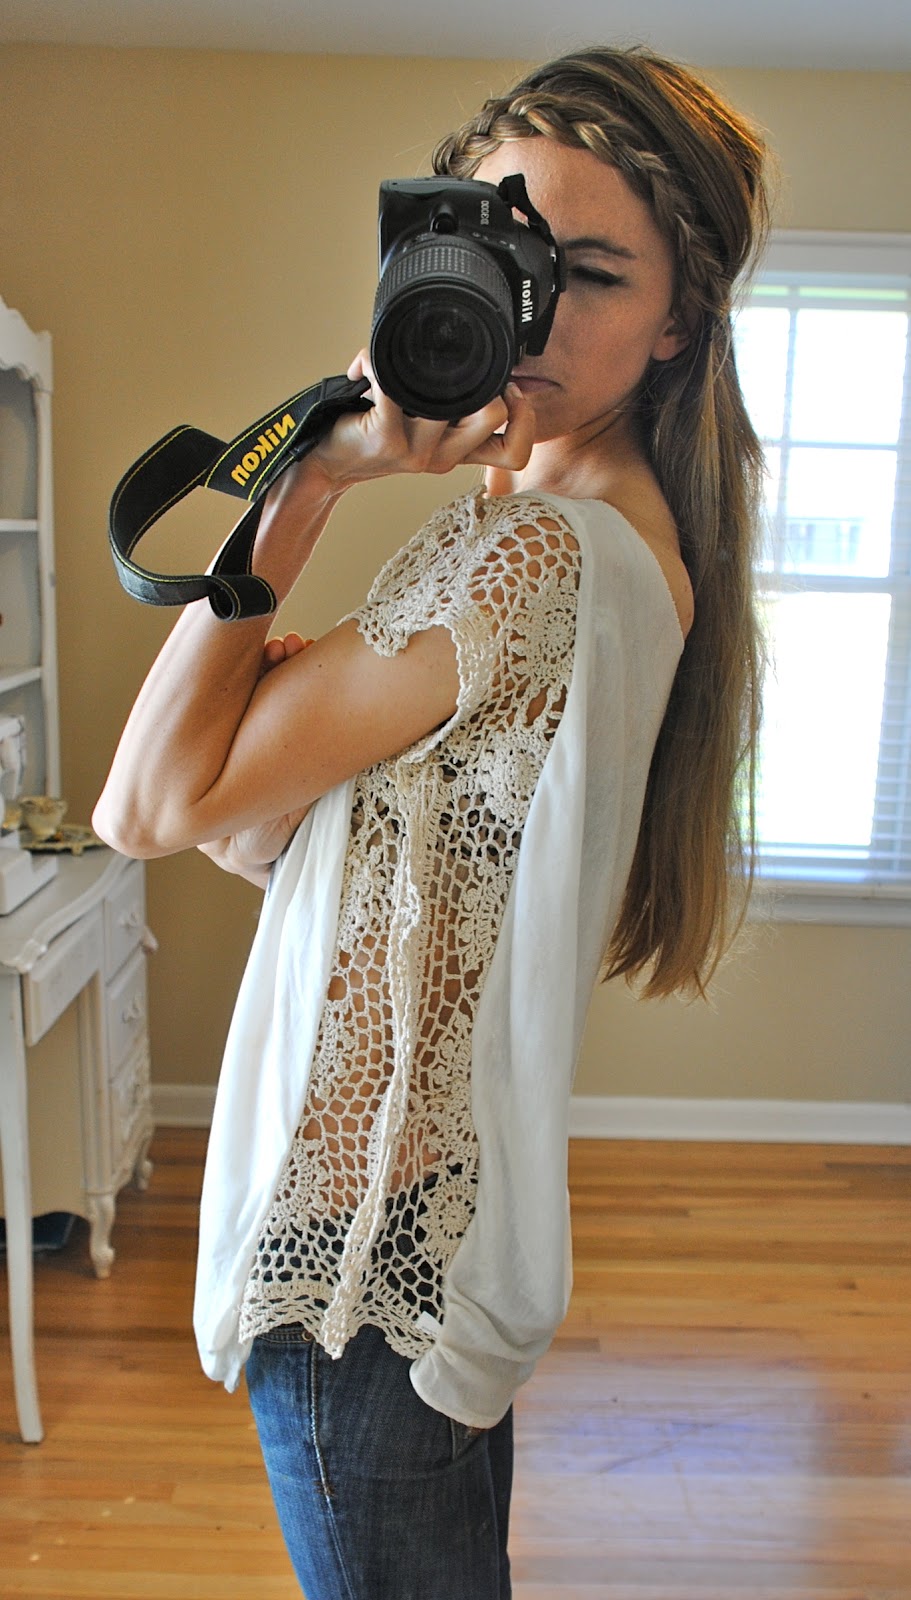
5.Up cycle Bouquet 6.Crochet Peek a boo Shirt ( one of my Fav's)
Supplies: Tshirt, crochet trim (a few yards)
I came up with this idea to make tight shirts wearable again. I had so
many cool tshirts yet most of them were purchased when it was trendy to
have them snug.
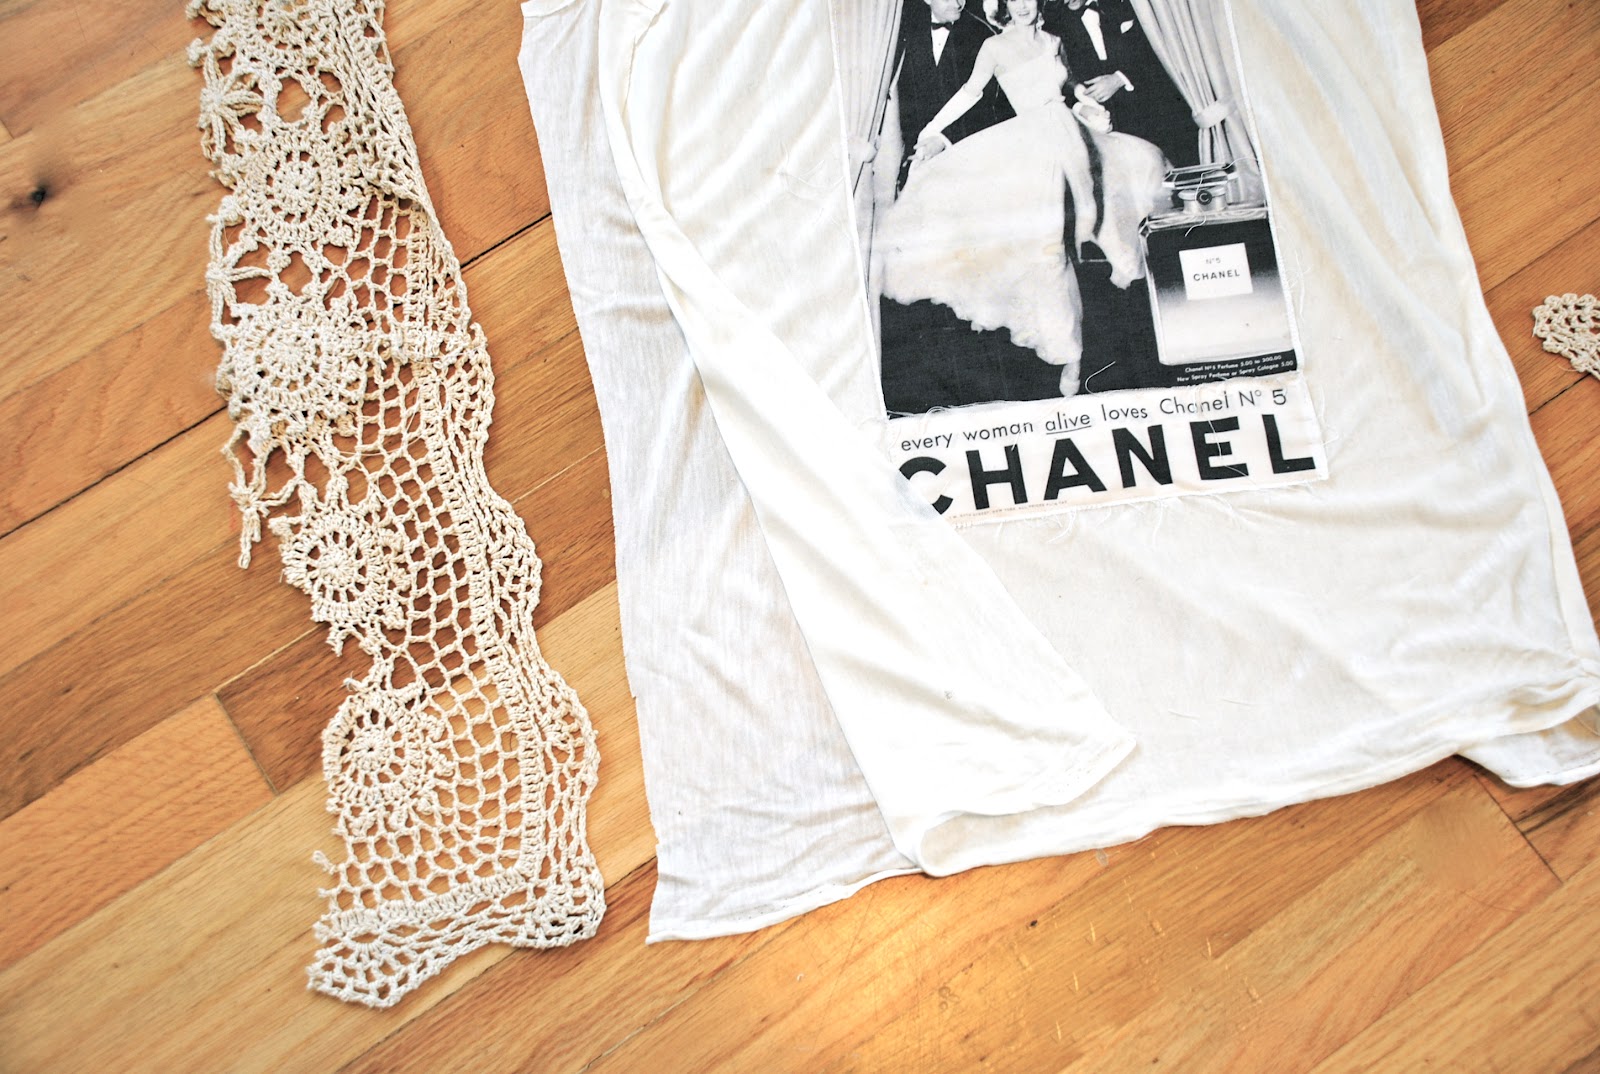
Measure the trim (you will do front to back).
Cut side seams and sleeves off if you use a tshirt (here I used a tank).
Sew front to back right sides together.
Lay out and pin where you want the armhole to go.
Top stitch new side seam leaving armhole open.
I did this with fringe trim as well here.
****Also with this you could use a lace curtains, or table cloth!****
7. Make continuousYarn from T-Shirt
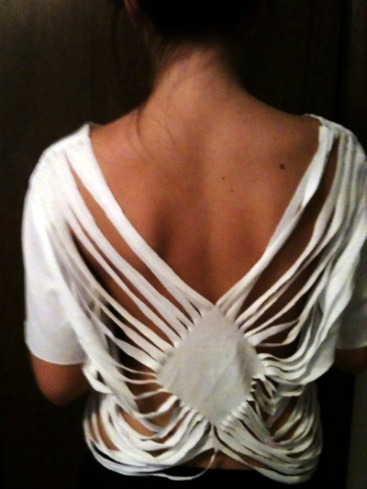
8. Sexy back T-shirt
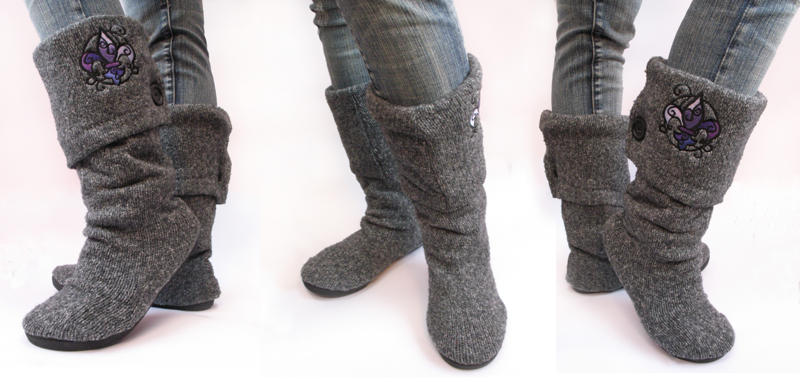
99.Boots from old Sweater! I started with this:
chopped off the sleeves, turned it inside out, and formed it to my foot.
Hot glued it to a shoe, like so...
flipped it right side out, and cut the bottom off the sweater to make a cuff..
Embroidered it..
Sewed it into a cuff that would flip out over the boot..
And now you have...Sweater boots!!
10. T-shirt totes
It's super easy to do! All you'll need is
an old cotton t-shirt, some sewing pins and thread, scissors- and
you're halfway there!
Cut off the sleeves and neck line t create your handles.
Pin and sew the bottom portion up.
Ok this was part one because there are so many more that we can do, so stay tuned I will be updating later today! :)
These looked over items, I run across a lot of and most the time they are shoved away, I thought may this would inspire you guys if you have some of these items to do some diy home decor! Enjoy the list!!
Green DoorDiy:
I have seen so many doors tossed into attics and basements, because they
are replaced by new plastic or metal ones, Yuck! I would rather keep
the wood door, but sometimes they need replaced because they just cant
serve there purpose anymore, well here are some great ways to still keep
those old doors around and looking great!
Chalk board door!
Make your own, at home even if you didnt have it hung as a door on a frame you could prop it agianst the wall and still use it as a chalkboard for kiddos. Chalkboard paint is EXPENSIVE, so here is a homemade recipe too for making your own Chalkboard paint!
{YEA EXTRA TUTORIAL} MAKE YOUR OWN CHALKBOARD PAINT!!!
Supplies:
1/2 cup acrylic paint (choose any color you like, or mix colors
together to make the perfect shade!), 1 tablespoon unsanded grout (this
can be purchased at most hardware/home improvement stores, we got ours
at Home Depot), mixing cup or bowl, spoon, paint brush and an object or
board you plan to paint on.
1. Measure out your paint and grout. The unsanded grout is a fine powder so be sure to work in a well ventilated area.
2. Stir the grout into the paint until no lumps remain. 3. Paint your
surface with your new custom chalkboard paint! The paint will begin to
harden once it is mixed, so only mix what you need at one time as it
won't store as well as other paints.
Once your chalkboard has fully dried be sure to slate the surface before
using it for the first time. To slate a chalkboard lightly rub chalk
along the surface and then lightly rub it off. Back to doors.......... Love this one Coffee Table of doors Doors for your garden..Beautiful! Door Shelves..... Door couch... Door Headboard{one of my Favorites!}
Wooden Ladders These are another great item that is looked over and tossed to the side, if you can get your hands on one there are some great ways up cycle some home decor!!
These are so cute and so easy to do.....I hope you are inspired by them like I am !
Drawers This is one I didnt really think about off the bat, but when I Saw some diy for this I was like DUH, why didnt I think of that....Drawers make great home decor!
Make planters, wall art...So much fun stuff!
Old Windows
this is another Item I sometimes I find in the attics and basments of old house that would
be perfect for some of these projects!
Ok I hope that inspired you all to go out and find some stuff in your attics to up cycle! Let me know what you find I am always curious to see what everyone is up too!


 Turn the T-shirt inside out, then cut across the
shirt from armpit to armpit. You'll need only the bottom section.
Turn the T-shirt inside out, then cut across the
shirt from armpit to armpit. You'll need only the bottom section. Use the needle and thread to sew a simple stitch
across the shirt, about a half inch in from the cut edge, to seal what
will be the bottom of the bag.
Use the needle and thread to sew a simple stitch
across the shirt, about a half inch in from the cut edge, to seal what
will be the bottom of the bag. Turn the shirt right side out. Snip the shirt's
hem almost all of the way through (do not cut any stitching) at the
midpoint between the two side seams. Attach a large safety pin to one
end of the clothesline cord. Feed the cord, safety pin first, through
the casing of the hem.
Turn the shirt right side out. Snip the shirt's
hem almost all of the way through (do not cut any stitching) at the
midpoint between the two side seams. Attach a large safety pin to one
end of the clothesline cord. Feed the cord, safety pin first, through
the casing of the hem. Follow the eyelet or grommet kit instructions to add eyelets to the bottom corners of the bag.
 Thread the ends of the cord through the eyelet holes and double-knot them to secure.